Anatomy of a Brass Monkey
- Simone Muscat

- Dec 25, 2021
- 5 min read
Updated: May 20, 2023
As we venture deeper into our pole ninja journey, we start to conquer a few different leg grips on the pole. When we first start out, we learn our basic climb, aka our knee, calf and shin grip. We then venture to our inside and outside leg hangs once we’ve nailed our inverts and even work on our thigh grip tricks (superman, laybacks) and our hip hold tricks (jade splits). But there’s one leg grip that holds a special place in our heart, that not only is a pretty cool trick on its own, but is a versatile trick and is key to unlocking many epic combo transitions later on. Yep, you guessed it, it’s our brass monkey grip!
In today’s blog we will break down the biomechanics of this position and cover a few common entries into this trick whilst our subsequent blogs will cover some on and off the pole strengthening to help you feel comfortable with this position. And then buckle up and hold on tight, because in later blogs (over the coming months) we will look to de-mystify our deadlift/press up version of our brass monkey!
Ready? Ok, let’s do this!
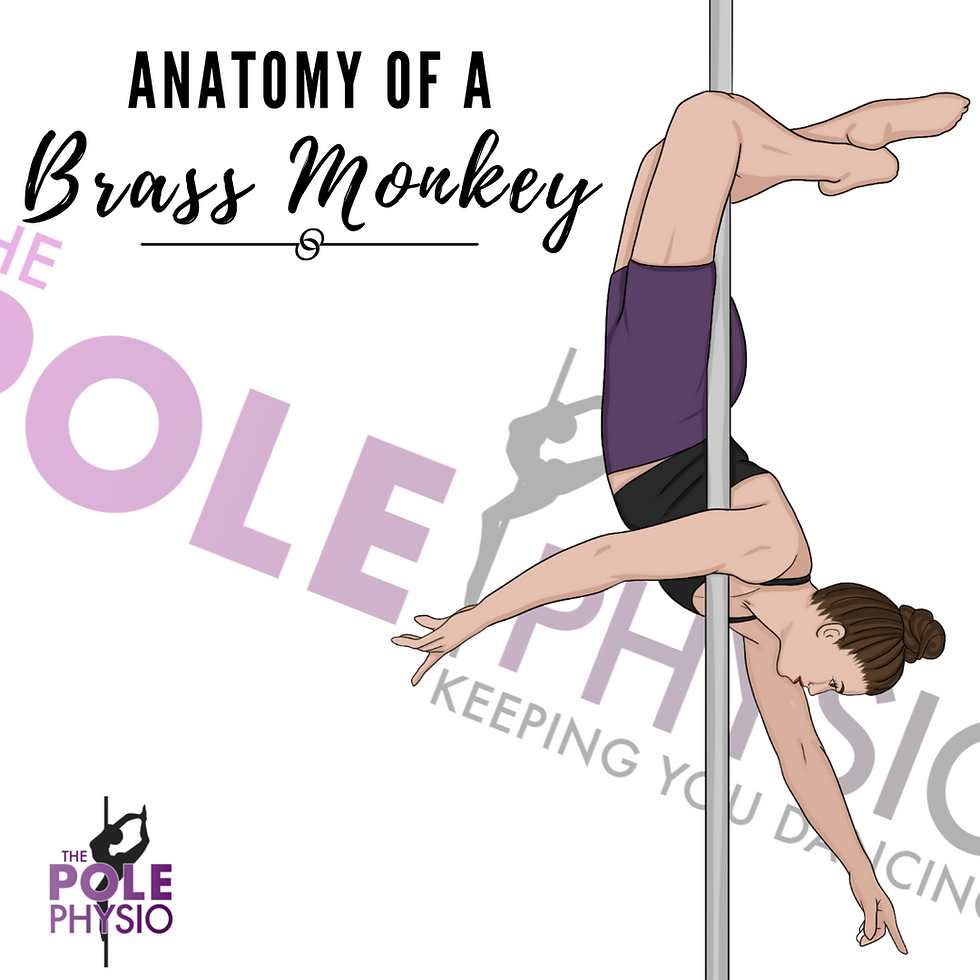
The Brass Monkey Grip
So, the brass monkey itself is not a really difficult move to nail, but the transitions in and out of it can be considered anywhere from intermediate to a high advanced level.
There are three key gripping points of our brass monkey grip to remember:
- Inside arm armpit
- Inside knee pit
- Outside arm hand
So no matter what transition you use to get into a brass monkey, the end result is always the same. In its basic form, a brass monkey grip requires an overhead push with both arms and a strong knee hook on the pole. However, there’s a bit more to it than just that!
Let’s start with the upper body.
Upper body
In our brass monkey grip our arms are on the pole, one positioned at 90 degrees of shoulder flexion and the other bent with the elbow by the side of the body. Both of these arms are required to perform an overhead push to maintain this position. Additionally, the straight arm is engaged into external rotation and the bent arm is slightly positioned in ~ 20 degrees internally rotated and pulling inwards into adduction (squeezing the pole with the armpit).


For both of our shoulders, our rhomboids, trapezius and rotator cuff muscles work to stabilise. As the shoulder is an inherently unstable joint, with the humeral head (shoulder) about 1/3rd of the size of the glenoid, impingement and subluxation may occur in the straight overhead arm of a brass monkey. The shoulder relies heavily on its surrounding muscular and ligamentous support to reduce these style of injuries. In addition to a strong leg hook of course!

When we perform our brass monkey hold with our hands off the pole, we naturally have a greater reliance on our leg muscles to hold this static position. Our shoulder on the inside of the pole has the role of adducting if needed for additional grip.


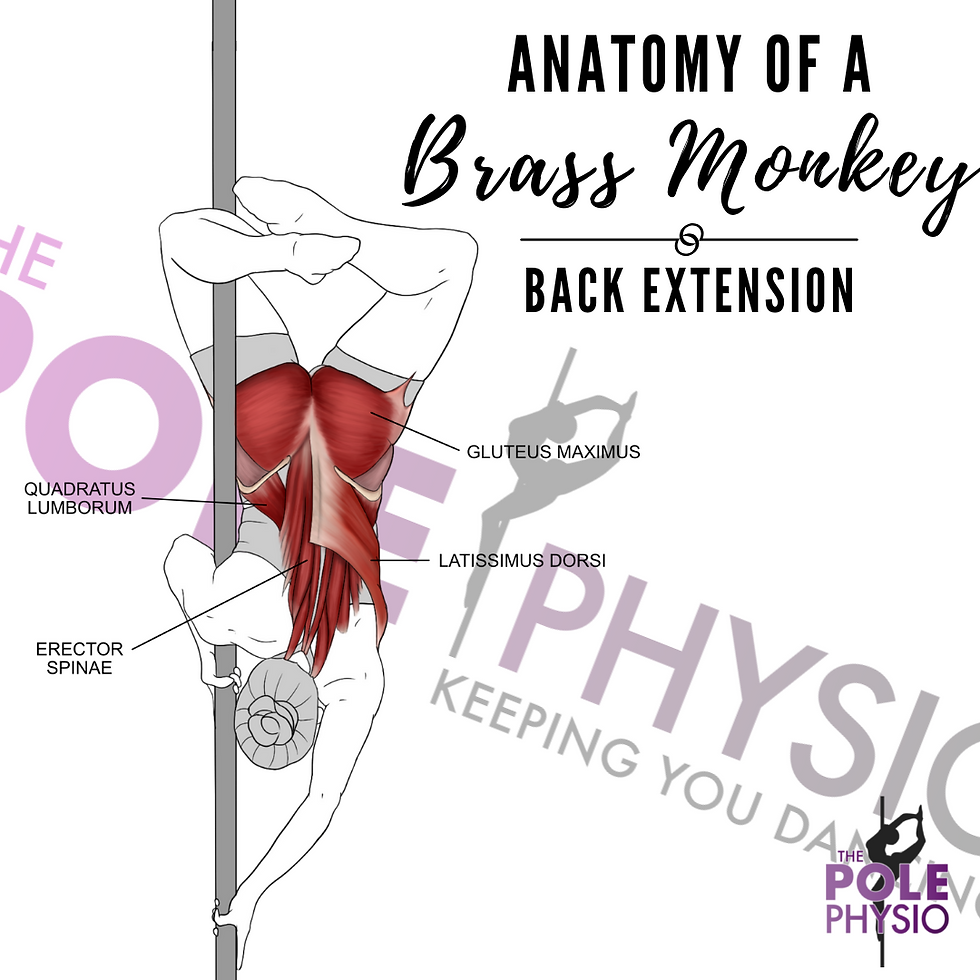
Trunk/core
Our body is positioned in slight lumbar extension in our brass monkey grip/hold, which means one of 2 things for our trunk:
Our abdominal muscles (primarily rectus abdominus and obliques) are required to work whilst being placed on slight stretch (eccentric activation). This activation allows for overhead shoulder pushing and a small degree of back extension whilst maintaining a posterior pelvic tilt. Additionally, our transversus abdominus, plays an important role of acting as our main abdominal stabiliser.
We need to focus on using our trunk extensors/anti-flexors muscles in this position to maintain our anti-gravity and lumbar extension position on the pole. This movement primarily occurs from our gluteus maximus, erector spinae and latissimus dorsi muscles.
Lower body
This section is key for our brass monkey grip. After all, this is what makes it unique to being a brass monkey! In our hold, both legs are positioned in external rotation (~45 degrees) and abduction (~20 degrees). This results in there being slight space between the knees and a cross over of the feet. The hips are also positioned in slight extension here which results in our hips being in front of the pole. And most importantly both knees are actively flexed to ~100 degrees, with the inside leg hooking the knee pit around the pole firmly to maintain our brass monkey grip. We are heavily reliant on our hamstrings and glute max to maintain our hip extension, whilst we require our glute max, glute medius and smaller cuff muscles of the hip to abduct and externally rotate the leg.


Getting out
Now don’t forget one of the most important parts of doing a brass monkey is knowing how to get out of it! Once you’re in this position you might feel a little bamboozled because your spatial awareness is a bit all over the place. But that’s ok! Before getting into this position, make sure you talk it through with your instructor on how you will be able to safely get out of it!
Requirements of our Brass Monkey Recap
So to summarise the requirements of our brass monkey grip we need:
- Shoulder and scapula stability/control
- ~ 90 degrees of shoulder flexion
- Vertical/overhead pushing strength
- Horizontal pulling strength of the inside arm
- Anti-flexion strength
- Hip abduction (~20 degrees) and external rotation (~45 degrees) range of motion
- Hip extension and knee flexion strength (a solid knee hook!)
Want to try?
Wondering if you’re ready for your brass monkey? Well, as mentioned earlier, the brass monkey itself isn’t too challenging, it’s the transitioning into this position that’s hard. So work with your instructor on building confidence in your transitions first before working on the hold.
In addition to some solid pole confidence and strength, key screening moves we would recommend ticking before attempting a brass monkey hold are:
- Push ups x 30+ (on knees)
- Seated pole pullups 2 x 5
- Single leg bridges 2 x 10 each leg
- Hamstring curls with a fitball x 20
- Reverse dish hold x 30 seconds
And don't forget a strong foundation on and off the pole will help you nail this move and progress in the safest and quickest way possible.
We hope you enjoyed nerding out on Brass Monkey anatomy as much as we did. Hold tight for our on and off the pole conditioning being released on socials shortly, along with our deadlift brass monkey coming out soon.
Have you been struggling to nail your Brass Monkey but not sure why? Or recovering with an injury and it’s getting in the way of your pole?
Online telehealth appointments can be booked with the Pole Physio via our ‘Book Online’ page that can be found here. Assessment and tailored rehabilitation are provided in accordance with best practice and evidence-based treatment to help you unleash your 'poletential'.
Until next time, train safe.
The Pole Physio
x
Please Note:
Any artwork on this or other pages of https://www.thepolephysio.com is copyrighted and is not be reproduced without written permission per the terms of use and conditions.
A Brass Monkey should ONLY be undertaken if your instructor has deemed you ready to work on this trick. This information is general advice only and we are not liable for any injuries that may occur during training.
This page has been created to provide wonderful knowledge with the pole community and sharing of this page to pole friends and pole related facebook groups is actively encouraged.


Wakad Wagholi Viman Nagar Vishrantwadi Shivajinagar SB Road Ravet Pune best city Pimple Saudagar Pirangut Marunji Nigdi Pashan Pimpri Chinchwad Magarpatta Lohegaon Koregaon Park Kalyani Nagar Kharadi Pune city Service Pune Star Hotel Hinjewadi Pune desire Pune Airport city Akurdi Aundh Balewadi Baner Bavdhan Bhumkar Chowk Pune city Chakan Dehu Road Deccan Gymkhana Dhanori best city
XY miner XY miner
cesur mining cesur mining
block chain cloud mining…
block chain cloud mining…
block chain cloud mining…
xy miners xy miners
rich miner rich miner
savvy mining savvy mining
xy miners xy miners
savvy mining savvy mining
savvy mining savvy mining
XY miner XY miner
cesur mining cesur mining
block chain cloud mining…
block chain cloud mining…
block chain cloud mining…
xy miners xy miners
rich miner rich miner
savvy mining savvy mining
xy miners xy miners
savvy mining savvy mining
savvy mining savvy mining
XY miner XY miner
cesur mining cesur mining
block chain cloud mining…
block chain cloud mining…
block chain cloud mining…
xy miners xy miners
rich miner rich miner
savvy mining savvy mining
xy miners xy miners
savvy mining savvy mining
savvy mining savvy mining
XY miner XY miner
cesur mining cesur mining
block chain cloud mining…
block chain cloud mining…
block chain cloud mining…
xy miners xy miners
rich miner rich miner
savvy mining savvy mining
xy miners xy miners
savvy mining savvy mining
savvy mining savvy mining